





When basketball zone defense explained is what you need to understand tactical game shifts, watching a coach suddenly call out a zone can completely change the rhythm of a match. Unlike traditional man-to-man defense where every player is locked onto a specific opponent, a zone defense treats the court as a grid of protected territories. It is a collective, team-first defensive system designed to dictate where the offense can and cannot go. By shifting the focus from individual matchups to spatial control, a zone forces the opposing team to abandon their usual plays and adapt on the fly.
Decoding the Inner Workings of a Zone Defense
To truly grasp how a zone operates, it helps to look behind the scenes at the strict rules, communication patterns, and spatial assignments that make this defensive system succeed or fail on the hardwood.
The three golden rules of zone positioning
A zone defense is not about standing still in one spot; it is a dynamic, constantly moving system governed by three fundamental principles.
- Rule 1: Ball-side overload — Wherever the basketball goes, the majority of the zone slides toward that side of the court to create a wall of defenders, effectively shutting down direct drives to the hoop.
- Rule 2: Protecting the paint first — Regardless of the specific setup, the primary goal of any zone is to keep the ball out of the key, forcing the offense to settle for long-range, lower-percentage outside shots.
- Rule 3: High-speed recovery — When the offense passes the ball across the court, defenders must sprint back to their assigned areas instantly to close out on shooters before they can set their feet.
Breakdown of the iconic 2-3 zone setup
While several zone alignments exist, the 2-3 zone is the undisputed foundation of zone defense at every level of basketball.
- The top unit (2 guards): Positioned near the free-throw line arc, these two defenders are responsible for pressuring the ball handler, disrupting perimeter passes, and contesting top-of-the-key jump shots.
- The baseline unit (3 forwards/centers): Stationed across the low post and paint, these three players protect the rim, contest corner shots, and secure defensive rebounds when the ball bounces off the rim.
- The hidden weakness: The primary flaw of a 2-3 zone is the gap right in the middle—the high post—and the open space in the deep corners of the three-point line.
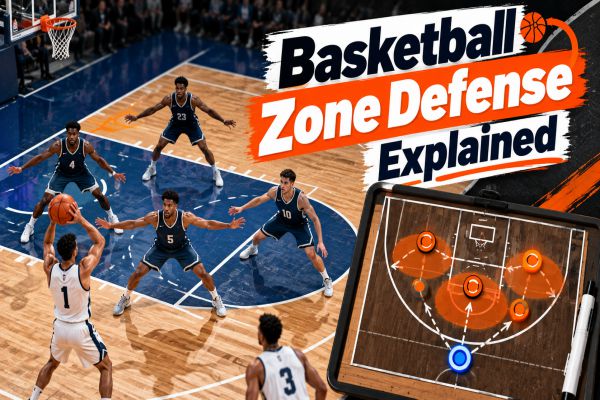
Basketball zone defense explained
Key tactical scenarios: When do coaches switch to a zone?
Coaches do not use a zone defense randomly; they deploy it as a strategic weapon in specific match situations.
- Facing a superior athletic driver: If an opponent has a lightning-fast point guard who regularly beats their defender off the dribble, switching to a zone places two or three bodies in their path, neutralizing their speed.
- Protecting star players from foul trouble: Because defenders in a zone guard areas rather than chasing aggressive scorers across screens, they are far less likely to commit reaching or blocking fouls.
- Slowing down a fast-paced game: A zone forces the offense to slow down, make multiple passes, and spend valuable time on the shot clock looking for an opening.
How smart offenses dismantle a zone defense
Every zone defense carries built-in structural flaws. When an offense recognizes a zone, they execute specific counter-strategies to break it apart.
- Feeding the high post: Getting the ball into the hands of a skilled passer standing at the free-throw line immediately collapses the zone, opening up baseline cuts and open perimeter jumpers.
- Fast ball swinging: Passing the ball rapidly around the arc faster than defenders can slide forces the zone to scramble out of position, leaving open spots in the corners.
- Offensive rebounding from the weak side: Because zone defenders guard areas rather than boxing out specific players, offensive players can sneak in from the backside to grab easy second-chance rebounds.
Conclusion
Having basketball zone defense explained as a tactical playbook sheds light on the geometry and team coordination that drives modern defense. Far from being a passive strategy, a well-executed zone is an aggressive, unified wall designed to deny easy paint access and test an opponent’s shooting discipline. Understanding how defenders slide, cover gaps, and protect space allows you to spot the high-level chess match playing out on every single possession.
Related Posts

Basketball Pick and Roll Explained: The Ultimate Tactical Guide
When basketball pick and roll explained is what you are searching for, viewing it purely as a two-man drill on paper misses what actually makes it work. On the court, a pick and roll is not a set play with a guaranteed outcome; it is a dynamic reaction to how the defense responds. Whether you […]

Basketball Shot Clock Explained: Simple Rules & Timing
When basketball shot clock explained is what you need to keep up with the game, watching the small digital timer countdown above the backboard can add an extra layer of tension to every possession. The shot clock is one of the most important tactical elements in modern basketball, dictating the tempo of play and forcing […]

Basketball Goaltending Explained: Simple Rim Rules
When basketball goaltending explained is what you need to understand key court rulings, seeing a referee blow the whistle and award points for a shot that never went through the hoop can seem confusing. Blocked shots are among the most thrilling plays in basketball, electrifying fans and shifting game momentum. However, there is a fine […]

Basketball Double Dribble Explained: A Simple Rule Guide
When basketball double dribble explained is what you need to understand court violations, seeing a referee blow the whistle and pat their hands alternately up and down can leave new fans and players confused. Ball control is the core mechanic of basketball offense, and strict regulations dictate how a player can handle the basketball while […]